Overview
Welcome to the Helix API Starter Kit! This is a simple python based script that can be found downloaded from the FireEye public GitHub. This overview is designed to help you with the first steps of using our Helix APIs, getting an API key and making your first request! We won’t cover all features and functionality of the Helix APIs (there are over 300 endpoints!), but the more feedback you provide us on our FireEye Developer Community, we’ll help answer your questions and add functionality to this and other packages.
If you haven’t done so, please visit the FireEye.Dev API section to learn about our API’s and see sample code and tutorials. This developer site (documentation and tools) is intended to be a starting point, but you might need to dig deeper into our documentation to help you get what you need. For existing customers, you should have access to FireEye’s full documentation portal and once you login, you’ll see every guide ranging from installation to usage.
Get Your API Key
Before using the Helix APIs you need to visit the FireEye IAM portal to get your API key (https://console.us.fireeye.com/console/settings/user). You must be granted access to IAM and have an active Helix subscription. Please ask your security administrator to grant you access to the portal.
FireEye IAM welcome page
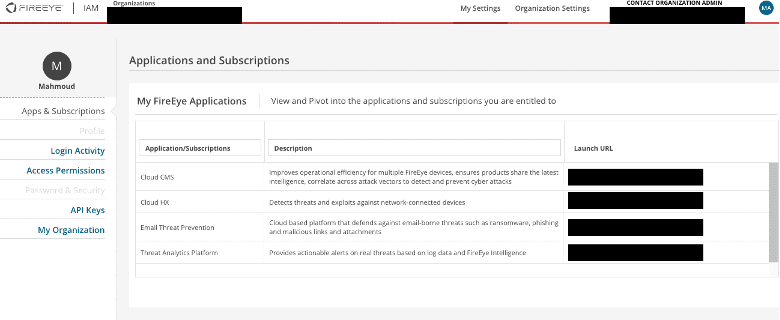
To start creating your API key, go to “API Keys” tap in the right-most column under your username
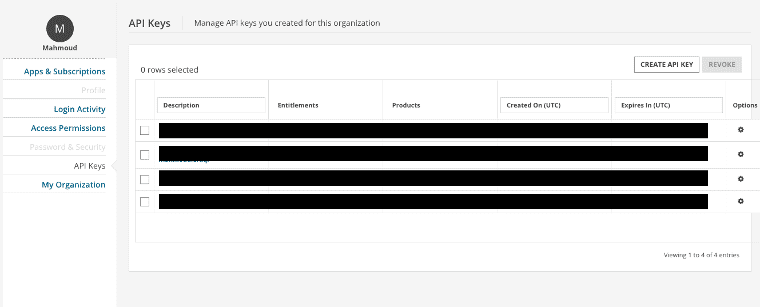
This is the API Keys table; there you will see all the API Keys you have created. If this is your first API key the table should be empty.
Go to “CREATE API KEY” to get started on configuring your API key
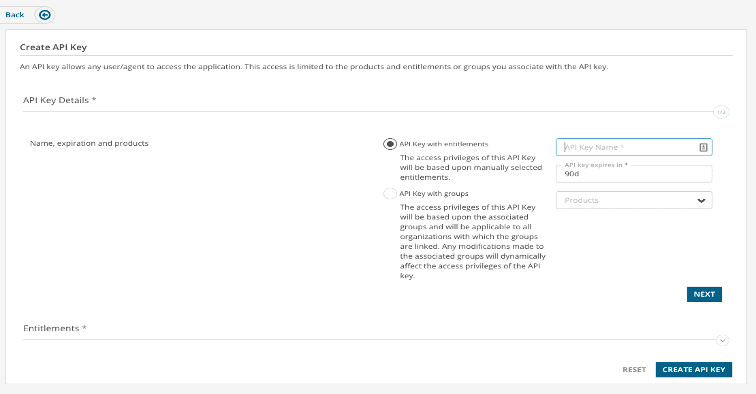
Give your API Key a unique name and set an expiration date no longer than 90 days.
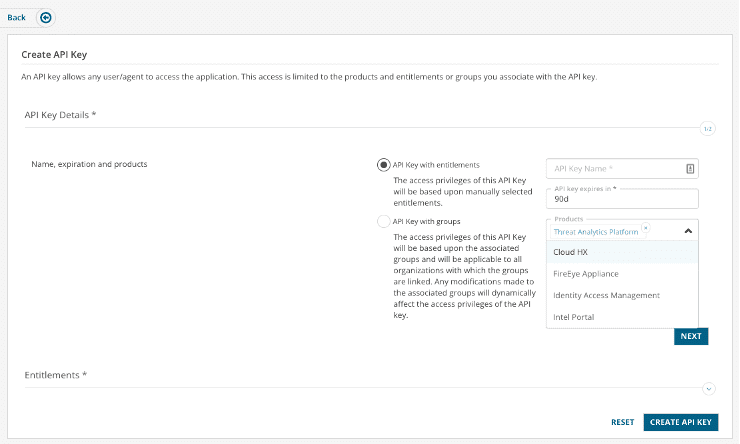
Now based on your account, you will have certain view access to Products you’re subscribed to. If this is for Helix click the Products dropdown and look for “Threat Analytics Platform”
Then, click “next”
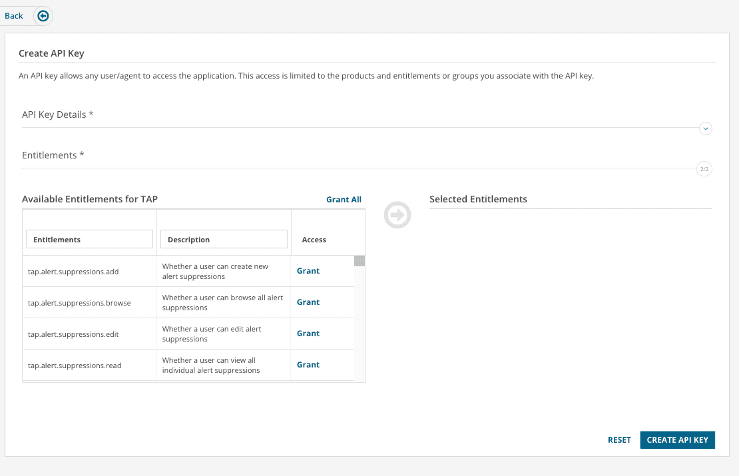
This is the last step; you will have to grant certain Entitlements for your Threat Analytics Platform (TAP) aka Helix. Now based on the use of your API you will need certain Entitlements to have permission to use the API. Entitlements are essentially API key permissions that allow you to use certain API calls, for this use case of the starter kit all you will need is the tap.search Entitlements to make calls to the search endpoint API.
For example, if you want to use the Helix Search API endpoint, you will need tap.search.browse and tap.search.regex.
So, pick the specific Entitlements, then Click “CREATE API KEY”.
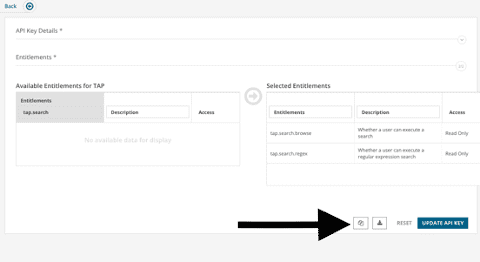
You can then download your API Key value, or just copy it to your clipboard.
This is it, now you have an API Key!
Setting Up Your Script
Please download the sample Python script from the FireEye Github that will allow you to get started quickly. This will give you the building blocks necessary to work with the FireEye Helix API and export information about events and alerts you have in Helix.
Note: if you don’t have python3 installed please install this first, follow this link: https://www.python.org/downloads/
Before running your script, you need to set up your config.ini file.
Once you can successfully login, you have verified all that you need to get started with our toolkit. To begin, open the Github package and open the file inside with the editor of your choosing. Inside, you’ll see the following parameters you will need to fill out to get started.

1st base_url, will be different for non-US users content your admin or visit FireEye IAM module to know what your base URL will be,
- For US users it will be https://app.fireeye.com
- For EU users it will be https://helix.eu.fireeye.com
- For AP users it will be https://helix.ap.fireeye.com
2st api_key, you must have your API Key and entitlements set up (this is shows in detail above and in the Helix Starter kit README.md)
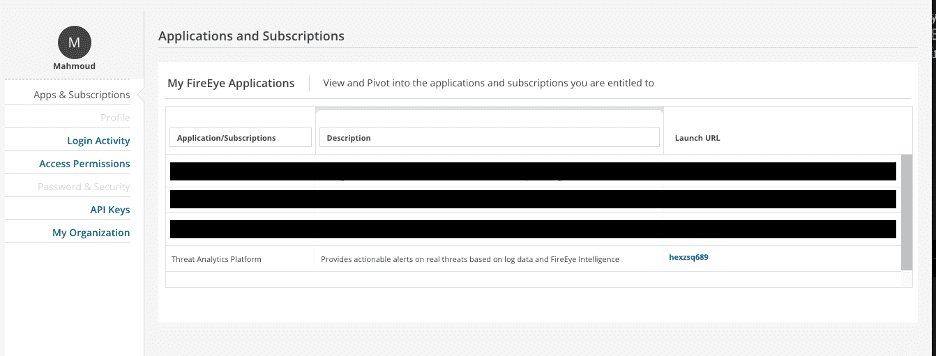
3rd helix_id, will be different for each instance of helix, you can find this in the FireEye IAM module in the “Apps & Subscriptions” tap in the table you will find a column called “Launch URL” under there find the “Threat Analytics Platform” row there you will see what your Helix ID will be, see below:
By default, FireEye Endpoint API uses port 3000 so you most likely won’t have to change that. Once you have that, you can run the script to see if it works! (Please ensure you have Python 3 installed, if you haven’t done so, please refer to this site for guidance Python For Beginners | Python.org
Running Your Script
Please open the terminal application on your machine to get started. At this point, you should have Python3 installed (see above for how to install python3), and have a valid account on the FireEye console with an API key (see above for how to get your API key). Please then navigate to the directory where you have saved the script, config.ini, and README.
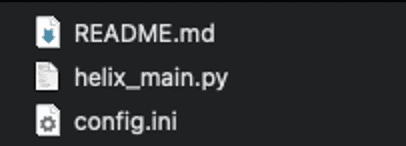
Go to the config.ini and make sure you have all your values filled in (see above for how to fill your values so you can authenticate through the API)
Open a Terminal (if you are on mac) or command line (if you are on a windows machine) we will run through an example of how to execute the Search option in the script. The search option is the same as the search query on the Helix UI, Helix UI uses a search language called MQL, to learn about its uses go to either the README or our developer hub to see examples and how its designed. We will show a basic search with a set amount of records to output.
This example is done on a Max OS platform:
First, run the help command to make sure you have all the proper options
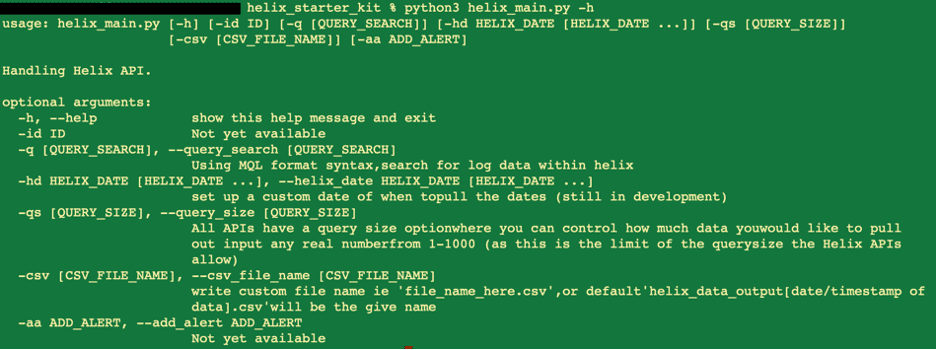
We will use the QUERYSEARCH (-q) option, QUERYSIZE (-qs) option, and CSVFILENAME (-csv) option, see the descriptions of each command in the image above.

Each option and its values as follows
QUERY_SEARCH (-q): “has:class”, this will pull any and all events that have a class which are all helix events/alerts. This search a sure way to confirm your API works properly and is pulling events.
QUERY_SIZE (-qs): “20”, this will pull only 20 events form helix, you have pull more up to 2000 records per API request.
CSVFILENAME (-csv): “test_file.csv”, this option names the file you will output your data too, this is a CSV file also known as a comma delimited file or excel file. (See below)

After you have ran the command and see your csv file, open it to see your events

As you can see above, only the specified 20 events are shown.
The python script will allow you to get a list of all events and alerts from the Helix API, saved to a CSV file.
The helix starter kit is meant to be used on a command line tool/terminal.
Give Us Feedback
Congrats on calling the Helix APIs for the very first time! Now that you have connected with the Helix APIs, keep us posted on what you are doing and ask us questions on how we can improve the Helix Start Kit on the FireEye Community.